Using Avid Studio
| ||||||||||||||||||||
For a simple outline of the digital movie-making process, you don’t have to look any further than the central tab group of Avid Studio’s main window.
![]()
Avid Studio’s main control bar summarizes the movie-making process. (The Export button does not appear if you have the Library tab selected.)
The Importer
Import, on the left, is a preparatory step. It involves procedures like ‘capturing’ video from your analog or DV camcorder, bringing in photos from a digital camera, and copying media files to your local hard drive from a network location.
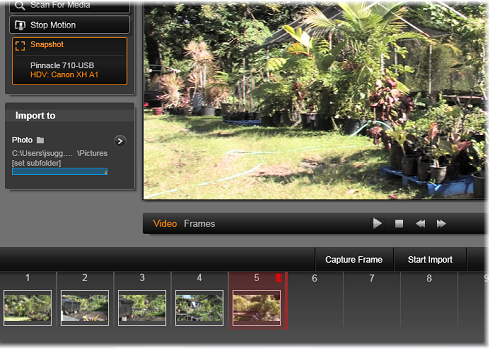
The Avid Studio Importer provides tools for these tasks, along with a Snapshot feature for grabbing frames from video files, and a Stop motion tool for building up video frame-by-frame.

Principal controls in the Importer’s Snapshot tool.
The Exporter
At the other end of the movie-making process is Export. By the time you get to this stage, the hard part of the task is behind you. The creative energy that went into making your movie has paid off in a production that now lacks only one ingredient – an audience.

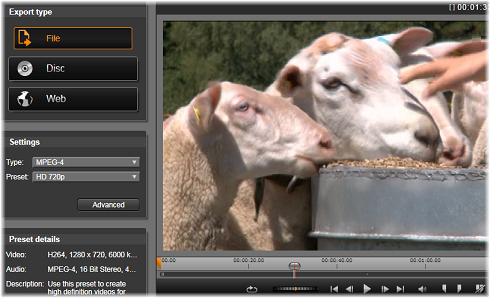
Preparing to create a video file in the Exporter.
The Avid Studio Exporter helps you over that last hurdle with tools for taking your movie to its viewers, whoever and wherever they might be. Create a digital movie file in the format of your choice, burn a DVD, or even upload directly to your YouTube account.
Like the Importer, the Exporter opens in a separate window, and returns to the main window after its work is done.
The central tabs
The three central tabs, Library, Movie and Disc, are where most of your work in Avid Studio takes place. The first of these opens the main view of the Library, where you can ‘curate’ your media collections.
The other tabs open the two project editors, one for digital movies, and the other for disc projects, which are digital movies enhanced with interactivity in the form of DVD menus.
